
Creating a custom tool
On the agent’s Tools tab, open Custom tools and click Add custom tool. Name and describe it, set the method and URL, define the parameters the agent should collect, build the request around them, and save. Then test the agent with a call that should trigger the tool.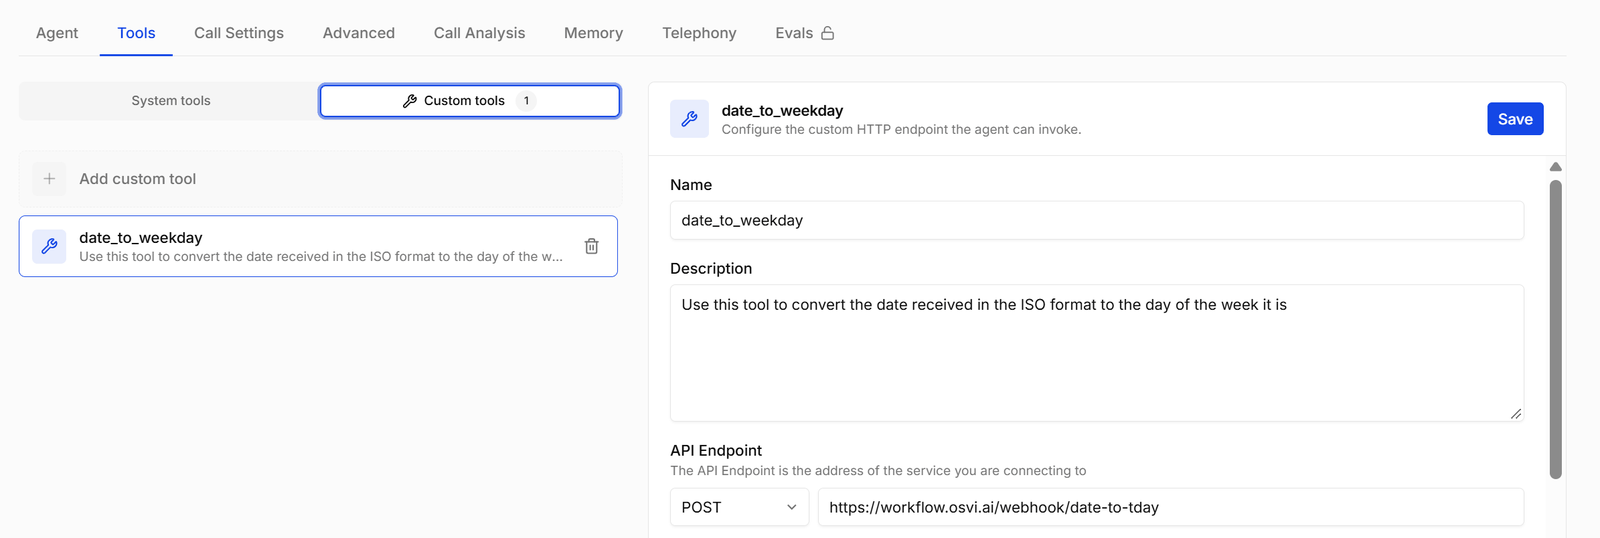
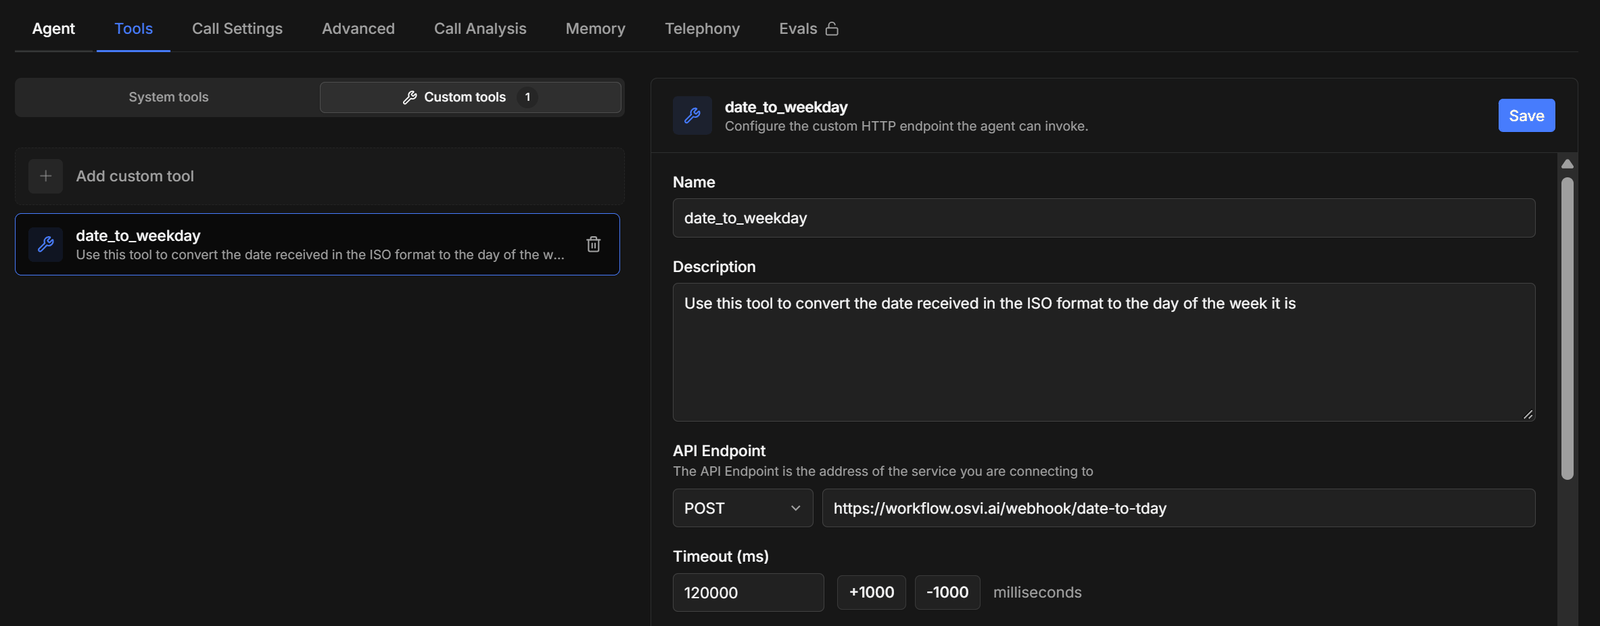
Fields
Parameters
Parameters are the details the agent collects from the conversation and passes to the tool — a date, an order number, a doctor’s name. Define them in the Form editor with + Add parameter, or as JSON.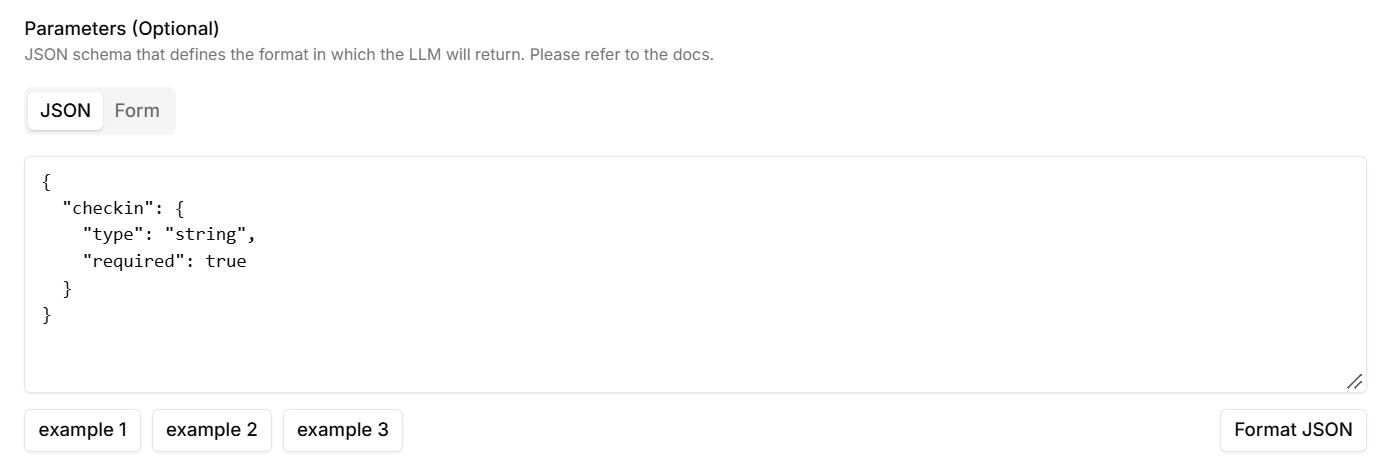
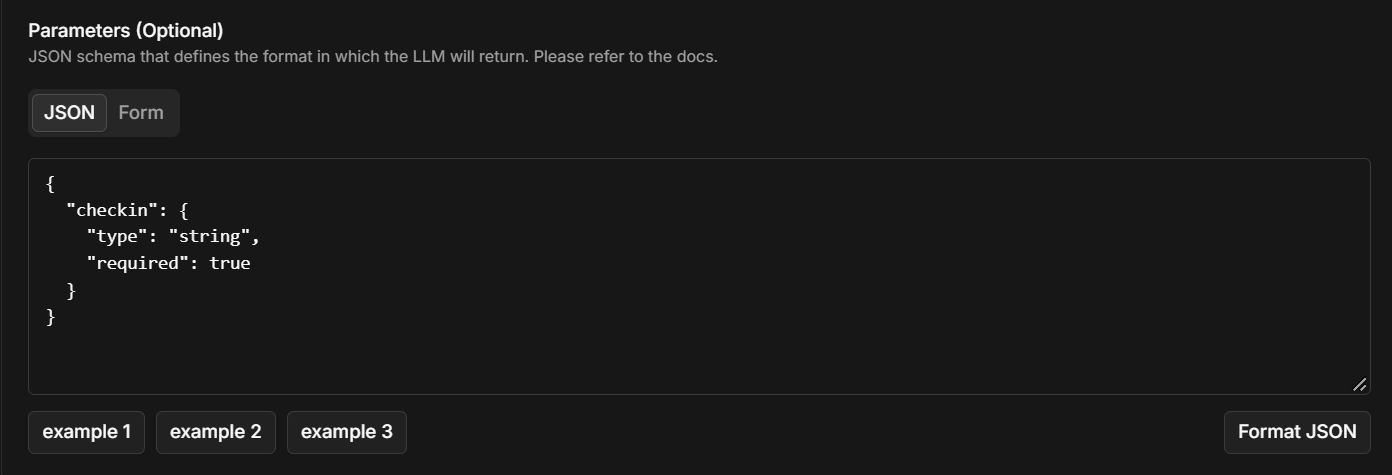
checkin, as a string. Use the Form editor if you’d rather fill in fields than write JSON, and Format JSON to tidy what you’ve typed.
For each parameter:
Clear descriptions give you cleaner values. If your API expects a specific format — a date, a phone number with country code — say so in the parameter’s description.
How the request is built
Parameters don’t go into the request on their own. You place each one where it belongs by writing its name in double curly braces —{{order_id}} — in the URL, a query parameter value, a header value, or the payload. When the agent uses the tool, each placeholder is replaced with the value it filled in.
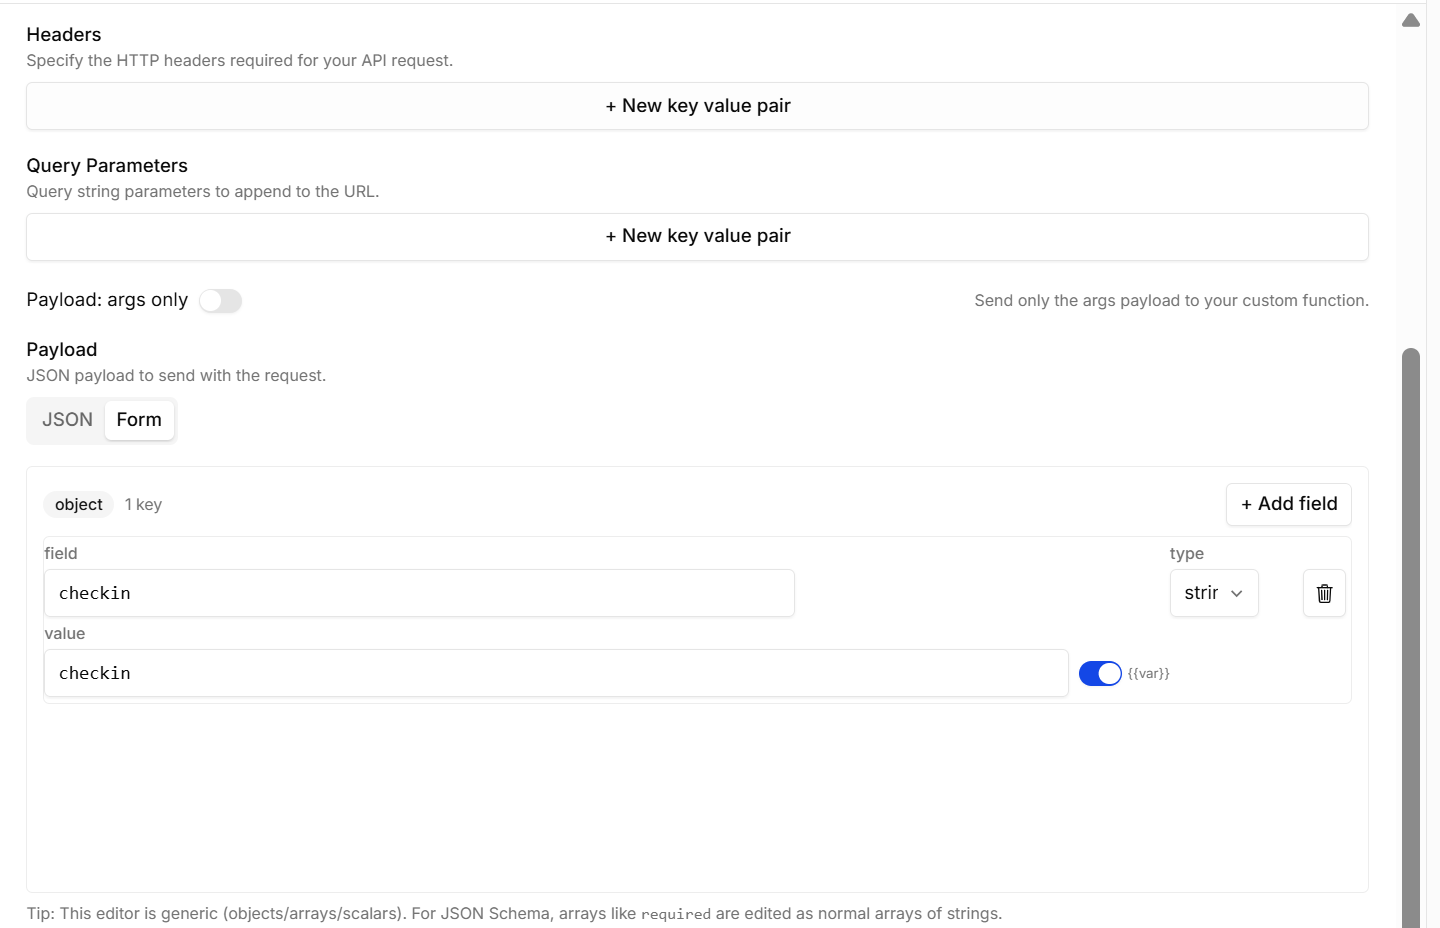
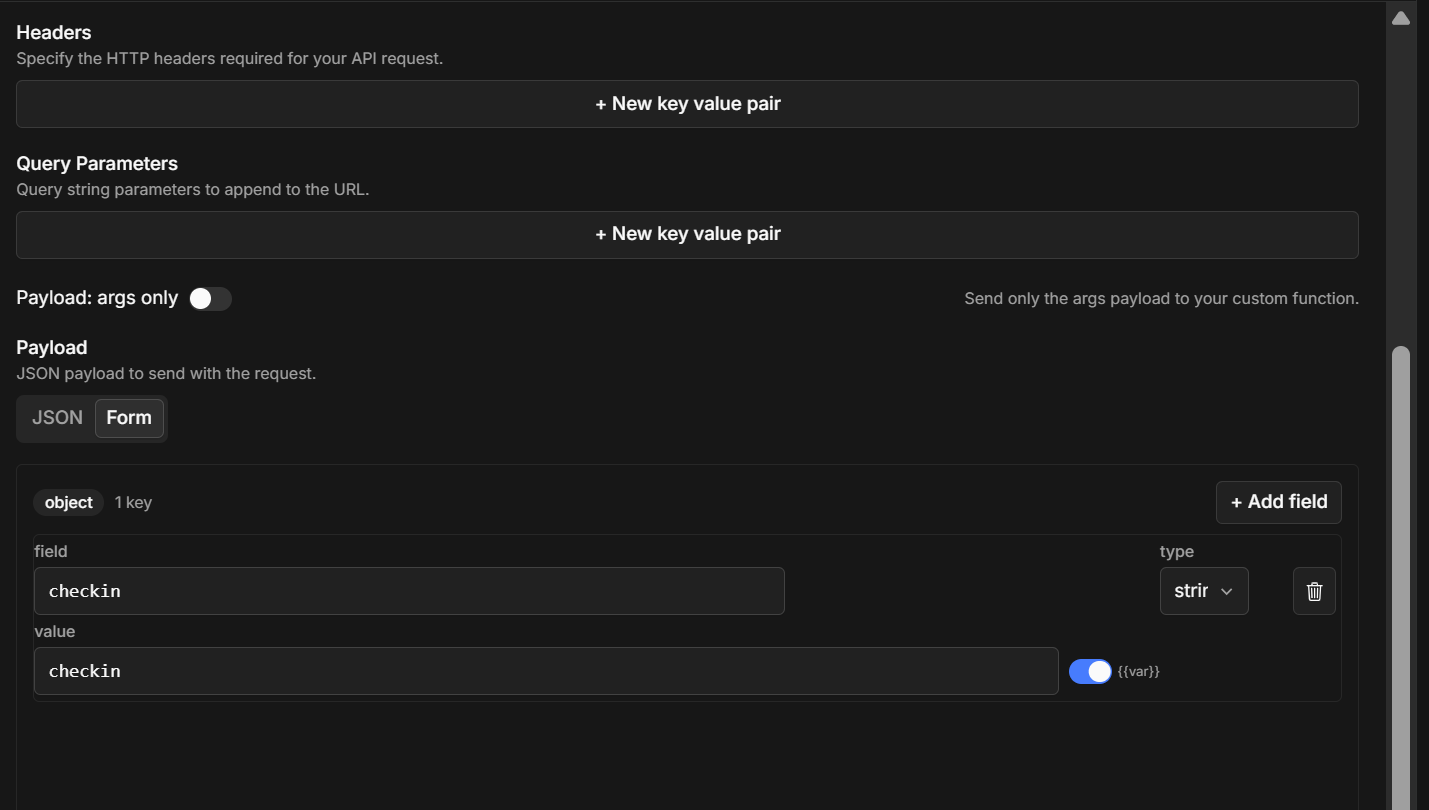
checkin field’s value is switched to a placeholder with the {{var}} toggle next to it, so the agent’s value is filled in there.
Placeholder rules
- Write placeholders without spaces:
{{order_id}}, not{{ order_id }}. - A placeholder’s name must match a parameter’s name exactly.
- A parameter with no placeholder anywhere isn’t sent.
- When a placeholder is the entire value —
"quantity": "{{quantity}}"— the value keeps its type, so numbers, lists, and objects arrive as real JSON. Inside longer text —"note": "Order {{order_id}}"— it’s inserted as text. - Placeholders work in values, not in key names.
Methods and the request body
The body is sent as JSON by default. To send form data instead, add a header
Content-Type = application/x-www-form-urlencoded.
To control exactly what’s in the body, turn Payload: args only off and write the payload yourself with placeholders.
Using call details
Placeholders are filled only with parameters the agent provides — details from the call itself, such asperson_name or fields from additional_data, can’t be used in a tool directly.
To pass one along, put it in the system prompt and declare a matching parameter:
- In the prompt:
The customer's ID is {{ additional_data.customer_id }}. Pass it to tools that ask for it.(see Prompt writing) - In the tool: a required parameter
customer_idwith the description “The customer’s ID from the prompt.” - In the request:
{{customer_id}}wherever your API needs it.
What happens with the response
Your API’s response is passed back to the agent, which uses it to reply to the caller:- Success (2xx) — the agent reads the response body and answers from it. JSON is passed along formatted; anything else as plain text.
- Error (any other status) — the agent is told the request failed, with the status code and body, and responds accordingly.
Example: booking an appointment
The tool
Parameters
Payload
Troubleshooting
The agent never uses the tool
The agent never uses the tool
The description is the only thing the agent goes on. Make it specific about when to use the tool, and check the system prompt doesn’t tell the agent to avoid it.
My API receives {{something}} literally
My API receives {{something}} literally
The placeholder’s name doesn’t match a parameter, or it has spaces inside the braces. Use
{{name}} with the exact parameter name.A value is missing from the request
A value is missing from the request
Every parameter must be placed with a placeholder — a parameter that isn’t referenced anywhere isn’t sent. For GET and DELETE, the payload isn’t sent at all; use query parameters instead.
Values arrive in the wrong format
Values arrive in the wrong format
Describe the exact format in the parameter’s description (for example, “YYYY-MM-DD”), or restrict it with allowed values.
The caller hears silence while the tool runs
The caller hears silence while the tool runs
Add “Tell the caller you’re checking before using this tool” to the description, lower the timeout, and speed up your endpoint.